


Song: 2Sweet Fun Song 2
Stage 1:
- Building the chorus beats and bassline using Nexus only!
- Created chorus lead here
- Feeling like adding samples.. so.. let’s do it!
- Nexus > Dance Leads > LD A simple Saw is a nice lead that connects between 2 notes.
- Add vocal leads into chorus (skipped… unable to remember next day)
- Bounce to stage1_bounce
- Unload instruments to stage1_unloaded
Stage 2:
- Feel like adding strings, ended up adding ‘Omnisphere > Steps of Eternity 1’ feeling good!
- Remember to fix LEAD trailing missing note.
- Working on intro and verse
- “2Sweet” lick
- Bounce to stage2_bounce
- Unload instruments to stage2_unloaded
Stage 3:
- Complete the skeleton
Stage 4
- Improve intro and ending
- Lovely guitar feedback from omnisphere is nice guitar feedback
- Oink Oink from omnisphere is nice lead that connects between 2 notes.
- Bounce to stage4_bounce
- Unloaded to stage4_unloaded
Stage 5
- Fills nicely.
- Nexus > Xp Drums SIngles > DR FX 6 is thunder sound.
- Nexus > XP Drums singles > DR Subbass – is subsweep
- Added a funny dropping sound from Omni > Sinedrop > drops from any note!
- Bounce to stage5_bounce
- Unload to stage5_unloaded
Stage 6
- Make bridge fuller, add piano?
- Bounce to stage6_bounce

Song: 2Sweet Fun song
So after 7 months, they wanted the full version..
So resuming from stage 3…
Stage 4:
- Copy and pasted all the vocal parts for the song for the full song.
Stage 5:
- Adding details to icing on the arrangement..
- Bouncing to rough_stage5_bounce
- Unload to rough_stage5_unloaded
Stage 6:
- pads pads pads!
- Omni > Synth Poly
- Bounce to rough_stage6_bounce
- Unload to rough_stage6_unload
Stage 7:
- Mix!

Song Arrangement Production: Runaway
Stage 1:
- Started working from final chorus.
- Improved snare by stacking.
- Added hi-spray to snare hit for digital feel. Nexus > XP Drum singles > DR Snares 4 > bp cutoff > atk, delay, sustain (reduce).
- added blips by adding Nexus > XP Drum singles > DR hihats combo 8 > Filter bp cutoff > and added LFO effect to it to make it more random.
- Added explosions to snare and hits for more drama. Nexus > XP Drum singles > DR Percussions 1.
- Bounce to rough_stage1_bounce
- Unload instruments to rough_stage1_unloaded
Stage 2: Pads
- Omni nasal pulse phatty lead > plus EQ > plus high reverb = ghostly effect that stacks well with electric guitar rock song. Find a nice melody lead.
- For effects, add Omni Something is about to happen and Omni Planning revenge.
- Bounce to rough_stage2_bounce
- Unload to rough_stage2_bounce_unloaded
Stage 3: Bombs

Song: Dream Girls Friend
Stage 1: Skeleton
- So I wrote the song last night before I sleep.
- Now I use piano to play out a rough skeleton of the song.
- Then I record the chords.
- Then I added v guitar and groove beats.
- Now I finished a skeleton.
- Now to get the right key for the girls, I used gong tong peng you as range reference, first I get lowest and highest notes, and try to set the whole song in the same range.
- -2 = B key
- Decided to arrange a bit but starting from the end of the song!
Stage 2: Reverse arrangement
- Added bass
- then added kontakt guitar, coldplayish, need to use pedal
- Bounce to rough_stage2_bounce
- Unload instruments and save to rough_stage2_bounce_unloaded
Stage 3: Vocals
Stage 4: Mixing
Stage 5: new lyrics and recording.

How to configure Remote SL for Massive?
- Head to Automap software and run it
- Check and make sure the ‘Massive’ plugin has been checked in ‘Software Setup > VST’
- Restart Cubase or refresh plugin once done.
- Load the new ‘Massive (Automap)’ plugin instead of ‘Massive’.
- Now the default setup might not be too useful for sound making, so we configure each
knob by selecting ‘Mixer/Plug-in Mappings > Massive > Edit Mapping…’ - We add a new ‘Page’ of setup by selecting ‘Add Page’ in ‘Edit Mapping’ window.
Now the Remote SL hardware will have a new page of tools when you left-hand scroll up
or down on it. - Next we start assigning each knob and slider. The knobs and sliders that can be assigned
are the left 4 rows and the right 2 rows. The 3rd right row is for hardware/software communications. To start assigning, we can select ‘Learn > On’ in the ‘Edit Mapping’ window. - Then we turn or slide the knob we want to use on the Remote SL hardware.
- Then we modify the parameter in the loaded ‘Massive’ plugin in Cubase.
- That’s it! Start assigning the sliders and knobs you want to use. Create new ‘Pages’ if you like.
Remember to Save the Mapping into a file and back up, so that it can be used again
in the future when Cubase or everything is re-installed.

League of Legends 台服手動改美服介面 Changing Chinese LOL in Taiwan to English (ACELOL)
So I wrote a patch really quickly, that you may download here to get things working. It also allows you to restores the changes/patch so it you’re updating the game, or if the patch fails, you can go back 🙂
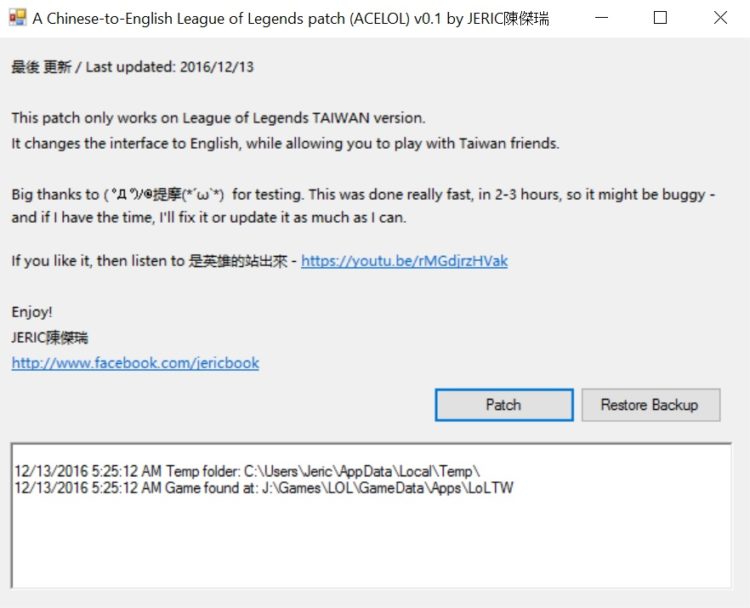
Download/ 下載 : http://bit.ly/2gF8WKD
- Close your game.
- Run the patch.
- Hit ‘Patch’
Use ‘Restore backup’ to undo the changes.
PS: You need to restore EVERYTIME there’s a game update, so the updates can run properly. After that, you can run the patch again to turn your game from Chinese to English. Remember, do this everytime there’s a new game patch!
Have fun!
UNDO everything before patching.. then redo…
2016/11/30:
added patching for:
C:\Program Files (x86)\GarenaLoLTW\GameData\Apps\LoLTW\Air\assets\dataPacks\items\colloq
ColloqPack_fontconfig_en_US as well .. replace it with ColloqPack_fontconfig_zh_TW
1.
the value from zh_TW to en_US: C:\Program Files (x86)\GarenaLoLTW\GameData\Apps\LoLTW\Game\DATA\CFG\Locale.cfg
2.
type and chat in chinese – 補充遊戲內顯示中文方法
C:\Program Files (x86)\GarenaLoLTW\GameData\Apps\LoLTW\Air\css
copy ‘fonts_zh_TW.swf’ to fonts.swf – back up original fonts.swf
3. Head to C:\Program Files (x86)\GarenaLoLTW\GameData\Apps\LoLTW\Air\locale.properties and change the value from zh_TW to en_US
4.
再來找到 C:\Program Files\GarenaLoLTW\GameData\Apps\LoLTW\Game\DATA\Menu
底下的 fontconfig_zh_TW.txt 開啟並複製以下文字
[FontConfig “English”] fontlib “fonts_tw.swf”map “$ButtonFont” = “FZXHYSZK”
map “$NormalFont” = “FZXHYSZK”
map “$TitleFont” = “FZXHYSZK”
map “$IMECandidateListFont” = “FZXHYSZK”
接著開啟 fontconfig_en_US.txt
覆蓋前六行(這很重要 複製錯會遊戲崩潰)
並關閉儲存 (repeatable during update)
5.
接下來最後一步
找到C:\Program Files\GarenaLoLTW\GameData\Apps\LoLTW\Game\DATA\CFG\defaults
底下的 GamePermanent_zh_TW.cfg 把他複製到桌面或備份的路徑
把檔案名稱改成 GamePermanent.cfg
把修改完成的檔案抓進資料夾覆蓋
— — just finish above … full contents below
==== perfect below =====
大廳修改方式
找到LOL資料夾 以下用我的安裝路徑作範例(假設安裝時沒修改)
C:\Program Files\GarenaLoLTW\GameData\Apps\LoLTW\Air
把 locale.properties 用記事本開啟
把裡面的 locale=zh_TW 修改成 locale=en_US
修改後關閉儲存
接者進入
C:\Program Files\GarenaLoLTW\GameData\Apps\LoLTW\Air\css
把底下的 fonts_zh_TW.swf 複製到桌面或另外一個或備份的路徑
把 fonts_zh_TW.swf 修改成 fonts.swf 複製到原本資料夾裡覆蓋
遊戲修改方法
找到 C:\Program Files\GarenaLoLTW\GameData\Apps\LoLTW\Game\DATA\CFG
底下的 Locale.cfg 使用筆記本編輯
把 LanguageLocaleRegion=zh_TW 修改成 LanguageLocaleRegion=en_US
接著關閉儲存
再來找到 C:\Program Files\GarenaLoLTW\GameData\Apps\LoLTW\Game\DATA\Menu
底下的 fontconfig_zh_TW.txt 開啟並複製以下文字
[FontConfig “English”] fontlib “fonts_tw.swf”map “$ButtonFont” = “FZXHYSZK”
map “$NormalFont” = “FZXHYSZK”
map “$TitleFont” = “FZXHYSZK”
map “$IMECandidateListFont” = “FZXHYSZK”
接著開啟 fontconfig_en_US.txt
覆蓋前六行(這很重要 複製錯會遊戲崩潰)
並關閉儲存 (repeatable during update)
接下來最後一步
找到C:\Program Files\GarenaLoLTW\GameData\Apps\LoLTW\Game\DATA\CFG\defaults
底下的 GamePermanent_zh_TW.cfg 把他複製到桌面或備份的路徑
把檔案名稱改成 GamePermanent.cfg
把修改完成的檔案抓進資料夾覆蓋
(如果只有修改大廳文字更新後不會有影響)
如果遇到遊戲更新開啟遊戲有亂碼的話照著修改遊戲的步驟再做一次就會正常顯示字了千萬不要拿舊檔案去覆蓋 會遊戲崩潰
萬一不小心覆蓋遊戲崩潰的話 請去官方網站下載PATCH來更新
FOLLOW this perfect guide:http://forum.gamer.com.tw/C.php?bsn=17532&snA=181241&tnum=38

' ... )
第一課:摸索
昨天終于安裝了一些音樂軟体,好興奮。。
現在卻踫到釘子,要怎麽把藍色那塊移動呢?找傑瑞老師時間拉~
想法,問題,都寫在這裡,讓我,老師和大家都能知道在想什麽~
記得文章都要在右邊選擇 ‘Jenny 學習路程’ 的分類阿!
July. 23 -2013
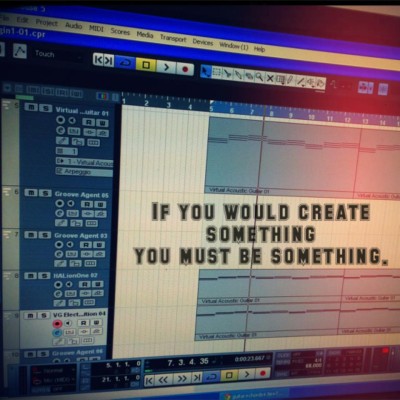
好的~~! 今天終於把Virtual Acoustic Guitar、HALionOne、Groove Agent、VG Electric Edition的音色和節奏都調好了!
但總覺得兩個小節或幾個小節過後,應該要來點不一樣的東西…
比如加強鼓聲的重拍,或是吉他的節奏與音色,但是只要一調整,整個音軌也跟著變…
原始一點的做法,就是再開一軌同樣的樂器 (再開一把吉他,選擇不一樣的彈法和音色),但是晚點才開始給他下 MIDI。 至於鼓呢,比較麻煩,下一堂課再教你。 – jeric
這次選用的合弦應該要找一首歌的和絃當範本,但我摸了兩首歌都覺得怪,抓不到和絃
於是我用了”卡農”的和絃作為我”處女作”的”底妝”~
只是這組合弦如果沒有層次的編排,聽久了會很疲乏…
對…我現在已經在疲乏狀態….. ( z~Z~z~Z~ )
按下PAUSE之後,開始玩起FB…
照現在這樣的進度…. 20天能完成一首歌嗎我?!
天啊~~~做音樂真的不簡單啊~~~~~~~~ =0=”